⇐ Blog
How to write a complete GNOME application in Lua
A thorough guide to developing apps for Linux's GNOME desktop using the Lua programming language.
September 30, 2025
Lua is my favourite programming language, and GNOME is my favourite Linux desktop. For me, using Lua to write apps for GNOME is the natural course of action—in fact, this course of action has led me to become the maintainer of LuaGObject, which is built specifically to allow Lua code to interface with the core libraries for building GNOME apps.
This article is intended to be a comprehensive guide to writing your first GNOME app in Lua using LuaGObject. The article assumes that you already understand Lua and want to get started with building beautiful native applications for GNOME. I also assume you know how to use a command line to install and compile software. Having some knowledge of the C programming language, as well as the Make, Gettext, and Flatpak software will be helpful, but shouldn’t be required to understand this guide.
Note that I’m just a single person. Explanations which seem simple to me may not be simple for you. Please send an email if anything in this article is unclear—I want to help you, and I want to make this the best guide it can be!
Regular readers of this blog will know that I wrote a similar guide last year. This updated version is rewritten around LuaGObject instead of LGI, and leverages some new features added to LuaGObject. This guide also simplifies some parts of the app code, and covers certain aspects of application development not covered by the original.
Contents
- What You’ll Need
- Writing an App
- Running Lua from C
- Linking it Together
- Building with Flatpak
- Polishing
- Translation
- Next Steps
- Why?
1. What You’ll Need
The first thing you need is a computer running Linux. Ideally, you’ll want to be running the GNOME desktop—though if you’re looking to write apps for GNOME, chances are you are already happily using it!
To start this tutorial, ensure you have Flatpak Builder installed so you can build your app.
On Debian/Ubuntu,
$ sudo apt install flatpak-builder

On RedHat/Fedora,
$ sudo dnf install flatpak-builder
If you aren’t using the listed distributions, it’s assumed that you’ll know how to install these packages.
If you don’t have Flatpak installed, the flatpak-builder package should pull it in as a dependency. To be able to properly build a GNOME app in Flatpak, its SDK and platform libraries will need to be installed from Flathub:
Enable downloads from Flathub
$ flatpak remote-add --if-not-exists flathub \
  https://dl.flathub.org/repo/flathub.flatpakrepo

Install the GNOME 49 runtime and SDK
$ flatpak install org.gnome.Platform//49
$ flatpak install org.gnome.Sdk//49
If there’s a newer version of GNOME available, use that one instead.
If running the app only through Flatpak, you won’t be able to test your app until about halfway through this guide. If you’d like to run your app as soon as it’s written, you’ll need to install LuaGObject locally through LuaRocks:
On Debian/Ubuntu,
$ sudo apt install luarocks lua5.4 libgirepository-2.0-dev libglib2.0-dev
$ sudo luarocks-5.4 install luagobject

On RedHat/Fedora,
$ sudo dnf install luarocks lua glib2-devel
$ sudo luarocks install luagobject
On Debian, LuaRocks is invoked with the specific version of Lua that you’ll be writing your app against, which is 5.4 here as that is Lua’s latest version at the time of writing this. If a newer version of Lua has released and you’d like to run your app on it, be sure to change the 5.4 in the LuaRocks invocation to whichever version of Lua you want to use. RedHat automatically defaults to the latest version of Lua available, so there’s no need to specify a version.
Now that you’re ready to build Flatpaks—and you’re optionally ready to test the app outside of Flatpak—it’s time to write an app.
2. Writing an App
Start by creating a new folder to work in, then make a new file called main.lua and open it in your text editor or IDE of choice. Begin by inserting the following code into it:
main.lua
local LuaGObject = require "LuaGObject"

local Adw = LuaGObject.Adw
local Gtk = LuaGObject.Gtk
This loads the LuaGObject library, and then binds the latest versions of Adwaita and GTK to Lua, making them available as Adw and Gtk. This means that everything in those two libraries' namespaces can now be used.
GTK is the foundational toolkit for all GNOME apps, featuring many of the basic necessities such as buttons, simple layouts, and dialogs. Adwaita extends GTK with widgets that help to fulfill the GNOME Human Interface Guidelines. Additionally, Adwaita also applies custom styling to GTK widgets when used inside its own windows, ensuring a visual style consistent with the rest of the GNOME ecosystem.
Start by defining the application. Application windows will not stay open if not associated with a running app, so this is a necessary step.
main.lua
local LuaGObject = require "LuaGObject"

local Adw = LuaGObject.Adw
local Gtk = LuaGObject.Gtk

local app = Adw.Application {
	application_id = "com.example.LuaGObjectApp",
}
For this guide, I’ve linked the documentation for each class wherever they are instantiated. Feel free to peruse so you can understand what each widget does, and how they are intended to be used.
All apps need a window to hold their contents. The window must be shown only after the app itself starts running. The simplest way to do that is to write a function that creates and arranges the widgets into a window, which the function then returns.
Unlike other GUI toolkits, GTK and Adwaita do not automatically populate a window with a top bar to hold the window title and close button—this must be added explicitly. To make this task easier, Adwaita supplies a widget called a Toolbar View, which is made specifically to hold such bars.
main.lua
...

local app = Adw.Application {
	application_id = "com.example.LuaGObjectApp",
}

local function new_application_window()
	local title = Adw.WindowTitle.new(
		"Example App",
		"made with LuaGObject")
	local window = Adw.ApplicationWindow {
		application = app,
		content = Adw.ToolbarView {
			top_bars = Adw.HeaderBar {
				title_widget = title,
			},
		},
	}

	return window
end
In LuaGObject, a class name will act as a constructor when called as a function. This constructor can take a table as an argument, and each item in that table will be used to set a property to the given value. While it is conventional for classes in GObject-based libraries to use hyphen characters in their property names, this doesn’t play well with Lua’s syntax. To make it easier to read and write property values from Lua code, LuaGObject automatically maps hyphens in property names to underscores on the Lua side.
This last example creates an Application Window, associates it with the app that has already been initialized, and populates the window with all the necessary widgets for opening and closing it. The Window Title widget is created separately not out of necessity, but simply to fit within this page’s code preview. Feel free to instantiate it by assigning it directly to the Header Bar’s title_widget property.
It’s actually fully possible to define widgets within other widgets' constructor tables. Because the properties for child or content widgets expect any object of a widget type, and because constructors will return widgets, this is to be expected. The result of this code is that the widgets' hierarchy is expressed quite neatly within the code itself.
To get the app running on your machine, it’s necessary to start up the app object. This requires creating event handlers for two specific signals associated with the app object. Signals and event handlers are a feature of GObject that makes apps interactive. When subscribing to a signal, you’re essentially telling the object to call a specific function every time the signal is emitted.
main.lua
...

local function new_application_window()
	local title = Adw.WindowTitle.new(
		"Example App",
		"made with LuaGObject")
	local window = Adw.ApplicationWindow {
		application = app,
		content = Adw.ToolbarView {
			top_bars = Adw.HeaderBar {
				title_widget = title,
			},
		},
	}

	return window
end

function app:on_startup()
	new_application_window():present()
end

function app:on_activate()
	if not app.active_window then return end
	app.active_window:present()
end

app:run()
The meaning of the startup and activate functions will be discussed later. For now, just know that an app requires these functions to be defined before it can run.
At this point, the main.lua script produces the following window when executed:
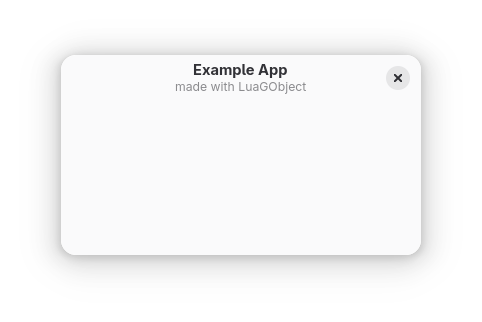
An empty GNOME application window with a minimal top bar.
If you haven’t done so, consider installing LuaGObject through LuaRocks so you can test your app right now. It’ll still be a bit of time before you’re running it the “normal” way through Flatpak.
I promised a thorough tutorial, and an app like this isn’t especially useful, so let’s add more features.
Continue by defining some extra widgets you’ll add to the window.
main.lua
...

local function new_application_window()
	local value = 0

	local label = Gtk.Label {
		halign = "CENTER",
		valign = "CENTER",
		extra_css_classes = { "title-1", "numeric" },
	}
	local function refresh_label()
		label.label = ("%d"):format(value)
	end
	refresh_label()

	local inc_button = Gtk.Button {
		icon_name = "value-increase-symbolic",
		tooltip_text = "Increase the value by 1.",
		extra_css_classes = { "circular" },
	}
	function inc_button:on_clicked()
		value = value + 1
		refresh_label()
	end

	local dec_button = Gtk.Button {
		icon_name = "value-decrease-symbolic",
		tooltip_text = "Decrease the value by 1.",
		extra_css_classes = { "circular" },
	}
	function dec_button:on_clicked()
		value = value - 1
		refresh_label()
	end

	local title = Adw.WindowTitle.new(
		"Example App",
		"made with LuaGObject")
	local window = Adw.ApplicationWindow {
		application = app,
		content = Adw.ToolbarView {
			top_bars = Adw.HeaderBar {
				title_widget = title,
			},
		},
	}

	return window
end

...
GTK and Adwaita use a mechanism called “signals” to create an event system. You can define functions which are called when a given object tries to “emit” a signal. The Button class' clicked signal is the simplest to understand—it is emitted whenever the button is clicked. Signals allow application developers to code interactivity into their apps. The result here is that the two buttons will either increment or decrement the given value, when clicked.
Note that LuaGObject maps an object instance’s signals by prepending on_ before the name of a signal, and mapping hyphens to underscores (as with properties). Consult each class' documentation to learn which signals are available.
Simply defining the widgets isn’t enough to get them shown in any sensible way. GTK provides various container widgets which will arrange their child widgets in specific ways. The most straightforward is GTK’s Box class, which arranges children either in a column or a row depending on the given orientation property.
main.lua
...

local function new_application_window()
	...

	local dec_button = Gtk.Button {
		icon_name = "value-decrease-symbolic",
		tooltip_text = "Decrease the value by 1.",
		extra_css_classes = { "circular" },
	}
	function dec_button:on_clicked()
		value = value - 1
		refresh_label()
	end

	local horiz_box = Gtk.Box {
		orientation = "HORIZONTAL",
		spacing = 12,
		dec_button,
		inc_button,
	}

	local vert_box = Gtk.Box {
		orientation = "VERTICAL",
		halign = "CENTER",
		valign = "CENTER",
		spacing = 6,
		label,
		horiz_box,
	}

	local title = Adw.WindowTitle.new(
		"Example App",
		"made with LuaGObject")
	local window = Adw.ApplicationWindow {
		application = app,
		...
Notice how the orientation, halign, and valign properties all have string values assigned? The class documentation would suggest that these properties take enumerated number values—not strings. These assignments work because LuaGObject automatically converts enum value nicknames to the underlying numeric value whenever it’s necessary. This saves a lot of space by allowing you to forgo grabbing specific enum values from their type tables.
Another remarkable thing is happening inside the constructors for Gtk.Box. Notice how the label and buttons are included in the tables? This should mean that LuaGObject will try to assign these widgets to properties named “1” and “2”, which don’t exist on the Box class. What happens instead is that the given widgets are automatically added into the boxes, as if the :append() method was called. In fact, the “top_bars” property in the Toolbar View is another example of similar behaviour provided by LuaGObject. You can consult the relevant documentation to learn more about this, otherwise simply note that many container-like classes will allow you to add children to the constructor in this fashion.
The net result of LuaGObject’s convenience features is that you don’t need UI definition files—or their successor, Blueprints—and can instead declare entire widget hierarchies with ease directly from Lua.
Still, one more thing needs to be done—the vert_box needs to be assigned to the toolbar view’s content property:
main.lua
	...

	local title = Adw.WindowTitle.new(
		"Example App",
		"made with LuaGObject")
	local window = Adw.ApplicationWindow {
		application = app,
		content = Adw.ToolbarView {
			content = vert_box,
			top_bars = Adw.HeaderBar {
				title_widget = title,
			},
		},
	}

	return window
end

...
Once the vertical box is placed within the ToolbarView, your app should look like this:
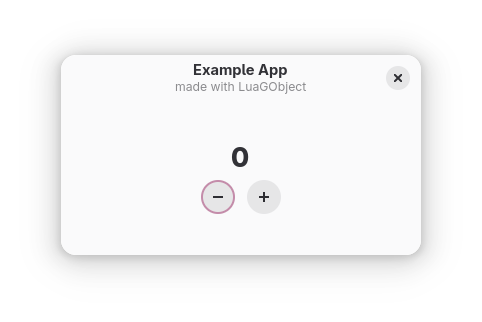
The application now functions as a very basic counter.
Clicking the two buttons should change the value in the counter. Now, the app actually does something useful!
At this point in the guide, your app’s code should be as follows:
main.lua
local LuaGObject = require "LuaGObject"

local Adw = LuaGObject.Adw
local Gtk = LuaGObject.Gtk

local app = Adw.Application {
	application_id = "com.example.LuaGObjectApp",
}

local function new_application_window()
	local value = 0

	local label = Gtk.Label {
		halign = "CENTER",
		valign = "CENTER",
		extra_css_classes = { "title-1", "numeric" },
	}
	local function refresh_label()
		label.label = ("%d"):format(value)
	end
	refresh_label()

	local inc_button = Gtk.Button {
		icon_name = "value-increase-symbolic",
		tooltip_text =
			"Increase the value by 1.",
		extra_css_classes = { "circular" },
	}
	function inc_button:on_clicked()
		value = value + 1
		refresh_label()
	end

	local dec_button = Gtk.Button {
		icon_name = "value-decrease-symbolic",
		tooltip_text =
			"Decrease the value by 1.",
		extra_css_classes = { "circular" },
	}
	function dec_button:on_clicked()
		value = value - 1
		refresh_label()
	end

	local horiz_box = Gtk.Box {
		orientation = "HORIZONTAL",
		spacing = 12,
		dec_button,
		inc_button,
	}

	local vert_box = Gtk.Box {
		orientation = "VERTICAL",
		spacing = 6,
		halign = "CENTER",
		valign = "CENTER",
		label,
		horiz_box,
	}

	local title = Adw.WindowTitle.new(
		"Example App",
		"made with LuaGObject")
	local window = Adw.ApplicationWindow {
		application = app,
		content = Adw.ToolbarView {
			content = vert_box,
			top_bars = Adw.HeaderBar {
				title_widget = title,
			},
		},
	}
	return window
end

function app:on_startup()
	new_application_window():present()
end

function app:on_activate()
	if not app.active_window then return end
	app.active_window:present()
end

app:run()
Your app is now functionally complete, but running it only within a script file is not a robust solution—especially if you want to distribute it. Thankfully, there are options to make the app far more robust.
3. Running Lua from C
What makes the most sense for deploying an application is if the code could somehow be compiled into a single executable program. With C, this is achievable. As you’ll see, the advantage to doing it this way is that you’ll be able to easily extend the capabilities of Lua by writing C code, and eventually by using C to bind to other libraries.
If you’re not familiar with C or otherwise are apprenhensive about it, don’t worry. You won’t need to write very much C code when following this tutorial.
In the same folder as main.lua, create a new file called main.c and open it in your text editor of choice.
main.c
#include <lua.h>

#include <lauxlib.h>
#include <lualib.h>

static const char main_bytecode[] = {
#embed "main.bytecode"
};
The first three lines import the declarations necessary to use Lua from C.
What you’ll aim to do is compile your Lua script into bytecode—that’ll be the next section of the guide, please be patient—which will then get embedded directly into the program you’re writing in C. From the C side, you’ll tell Lua to load and execute a script using the embedded bytecode. The #embed directive tells C to do exactly this—it embeds the given file as an array of byte values. These bytes are stored in a constant on the C side which is named main_bytecode.
The embed directive is new to C. In fact, it’s the primary reason why this guide recommends that you use version 49 or later of the GNOME SDK—earlier versions lacked this critical directive. To achieve the same thing without embed, you would have needed to use a few weird features in the C linker as well as engage in some very questionable pointer arithmetic.
main.c
...
static const char main_bytecode[] = {
#embed "main.bytecode"
};

int
main()
{
	lua_State *L;
	int lua_result;

	L = luaL_newstate();
	luaL_openlibs(L);
}
This code defines the main function, which is where the program will start running. The variable L contains the Lua state, which is the world your Lua program will live in. The two luaL_ function calls create and prepare Lua to run your script. The variable lua_result will be used to hold the result of certain calls to functions in Lua’s C API.
main.c
...

int
main()
{
	...

	L = luaL_newstate();
	luaL_openlibs(L);

	lua_result = luaL_loadbuffer(
		L,
		main_bytecode,
		sizeof (main_bytecode),
		"LuaGObject Example");
	if (lua_result != LUA_OK) {
		fprintf(stderr, "Failed to load.\n");
		return 1;
	}
	lua_call(L, 0, 0);
	return 0;
}
The first line begins with the function call into luaL_loadbuffer, which will load the compiled Lua script into Lua, and prepares it to be called. The sizeof keyword will return the length of the main_bytecode array in bytes, which is exactly what luaL_loadbuffer expects to be passed in. Because of how C works, the length information of an array like this is lost when passing only an array into a function, so passing in a length parameter is a necessity for this use-case.
If the script fails to load, the program will print an error message to the terminal and exit. The only reasons this could happen is if the script has a syntax error (which is not possible, as the script will have already been compiled) or there wasn’t enough memory. Neither error is recoverable, so the program simply exits.
If the script does load, then the function lua_call is executed, which runs your app.
At this point, your C code should look like this:
main.c
#include <lua.h>

#include <lauxlib.h>
#include <lualib.h>

static const char main_bytecode[] = {
#embed "main.bytecode"
};

int
main()
{
	lua_State *L;
	int lua_result;

	L = luaL_newstate();
	luaL_openlibs(L);

	lua_result = luaL_loadbuffer(
		L,
		main_bytecode,
		sizeof (main_bytecode),
		"LuaGObject Example");
	if (lua_result != LUA_OK) {
		fprintf(stderr, "Failed to load.\n");
		return 1;
	}
	lua_call(L, 0, 0);
	return 0;
}
With the C program finished, it’s now time to compile it.
4. Linking it Together
This tutorial uses Make to handle compilation. Make is somewhat outdated and struggles to scale upward for increasingly complex programs. This tutorial prefers it over the newer Meson for two reasons: 1) Meson does not support building Lua code and 2) I don’t know how to use Meson. Therefore: using anything other than Make to build your code is left as an exercise to you, the reader.
Create a new file called Makefile (with an uppercase M) in the same folder as the other files, and open it in your text editor.
Makefile
SRCS = main.c
BYTECODES = main.bytecode
BIN = main

PREFIX = /app
LIBS = -llua -ldl -lm
CFLAGS = -L $(PREFIX)/lib -Wl,-E $(LIBS)
The Makefile starts by defining six variables:
- SRCS: A list of .c files, also for compilation
- BYTECODES: A list of files to be created by compiling Lua code
- BIN: The name of the compiled program
- PREFIX: The location of the Flatpak sandbox
- LIBS: A list of C libraries that the program needs—Lua and its dependencies
- CFLAGS: Flags to be passed to the C compiler—this variable also uses the values stored in the PREFIX and LIBS variables
You’ll notice that the file main.lua is not specified here. That is explained below.
The Make program works by defining a list of “target” files to create, with recipes on how to create these files. To build the final executable, you need to compile your Lua scripts into the files defined in BYTECODES, which will then be embedded into C through the #embed directive you included in your code.
Makefile
...

PREFIX = /app
LIBS = -llua -ldl -lm
CFLAGS = -L $(PREFIX)/lib -Wl,-E $(LIBS)

$(BIN): $(SRCS) $(BYTECODES)
	cc -o $(BIN) $(SRCS) $(CFLAGS)

%.bytecode: %.lua
	luac -o $@ -- $^
Be sure to prepend the “cc” and “luac” lines with a tab character! Your text editor should be smart enough to do this, but it doesn’t hurt to be sure.
This explanation is a bit detailed—bear with me for a moment.
This change defines two Make recipes.
The first recipe is to create the content of the BIN variable (which is main). The dependencies, listed after the colon, are the contents of the SRCS and BYTECODES variables. The next line defines the actual command which must be executed to create the target file. It invokes the C compiler (cc), passes the output file flag -o followed by the file name to output (still contained in BIN), then passes all C source files (contained in SRCS), then finally passes the necessary C compiler flags (contained in CFLAGS). This recipe’s dependencies also specify that the contents of BYTECODES must be made first, which is where the second recipe comes in.
The second recipe is to create any file ending in .bytecode from a corresponding .lua file. The percent character indicates a file name pattern which must match on both sides, hence the correspondence. To create main.bytecode, which is wanted by main as defined in the first recipe, main.lua must also exist. In the command step starting with luac, the target file is automatically exposed by Make through the $@ variable, and the dependencies are exposed through the $^ variable. Thus, this command simply means to execute the Lua compiler (luac), outputting the current target bytecode file from its Lua script counterpart. Because main specifies main.bytecode is a prerequisite, Make will automatically invoke this second recipe, which creates main.bytecode from main.lua. This is also why main.lua was never specified in any of the variables you declared in the previous step—its necessity can be inferred by the necessary .bytecode file’s name, because of how the recipes are defined.
To summarize: These two recipes instruct Make to create the executable program, tells Make that a Lua bytecode file must exist first, and also defines a recipe to automatically compile a Lua script into Lua bytecode, which is then included in the C code through the embed directive you wrote earlier.
Only one more step is needed to get this Makefile in working order:
Makefile
...
%.bytecode: %.lua
	luac -o $@ -- $^

.PHONY: install

install: $(BIN)
	install -D -m 0755 -t $(PREFIX)/bin $(BIN)
This is what’s known as a phony recipe. It behaves like a normal Make recipe, but doesn’t produce a file. This install step does exactly what it implies: it installs the program into the necessary destination. Flatpak will automatically invoke this step when it compiles your app, which is why it needs to be included here.
Your Makefile should now look something like this:
Makefile
SRCS = main.c
BYTECODES = main.bytecode
BIN = main

PREFIX = /app
LIBS = -llua -ldl -lm
CFLAGS = -L $(PREFIX)/lib -Wl,-E $(LIBS)

$(BIN): $(SRCS) $(BYTECODES)
	cc -o $(BIN) $(SRCS) $(CFLAGS)

%.bytecode: %.lua
	luac -o $@ -- $^

.PHONY: install

install: $(BIN)
	install -D -m 0755 -t $(PREFIX)/bin $(BIN)
However, if you try to run Make to build your program, it won’t work. That’s because the app will live in Flatpak, and you haven’t set your app’s sandbox yet.
5. Building with Flatpak
One big problem with developing software for Linux is that the ecosystem is quite fragmented. Some distributions may have a version of GNOME which lags behind the current one by several years, and this would apply to the Adwaita and GTK libraries as well. In fact, if you tried running the Lua script on its own on Debian 12 (the previous version of Debian), it wouldn’t work because its version of Adwaita is missing the ToolbarView class. You could build your app with these older library versions in mind, but that means forgoing useful new features introduced in later versions of these libraries.
Flatpak allows you to sidestep this problem by providing your own libraries in a sandbox which has been isolated from the rest of the user’s operating system. It is for this reason that Flatpak is the recommended way to distribute GNOME apps, and it is why this tutorial hinges on it. Helpfully as well, Flatpak also has its own app store called Flathub, where you’ll eventually want to distribute your finished app.
To get started with using Flatpak for your app, create a new file named com.example.LuaGObjectApp.json and add the following to it:
com.example.LuaGObjectApp.json
{
	"app-id": "com.example.LuaGObjectApp",
	"runtime": "org.gnome.Platform",
	"runtime-version": "49",
	"sdk": "org.gnome.Sdk",
	"command": "main",
}
As before, make sure to set the value of “runtime-version” to match the version you installed in the first section.
This file is your app’s Flatpak Manifest. It identifies your app, gives the runtime that Flatpak should use when running it, the SDK that should be used to build it, and the name of the app’s executable.
com.example.LuaGObjectApp.json
{
	"app-id": "com.example.LuaGObjectApp",
	"runtime": "org.gnome.Platform",
	"runtime-version": "49",
	"sdk": "org.gnome.Sdk",
	"command": "main",
	"finish-args": [
		"--device=dri",
		"--share=ipc",
		"--socket=session-bus",
		"--socket=fallback-x11",
		"--socket=wayland"
	],
}
Note the absence of a comma in the line with “wayland” in it! Commas need to be elided at the end of lists inside this manifest—that’s just how JSON works.
These lines give additional permissions to your app’s sandbox, exposing specific parts of your system which are needed to run GNOME apps.
The last part of a Flatpak manifest is the build step. Start by telling Flatpak how to get Lua:
com.example.LuaGObjectApp.json
{
	...
	"finish-args": [
		"--device=dri",
		"--share=ipc",
		"--socket=session-bus",
		"--socket=fallback-x11",
		"--socket=wayland"
	],
	"modules": [{
		"name": "lua",
		"no-autogen": true,
		"make-install-args": ["INSTALL_TOP=/app"],
		"sources": [{
			"type": "archive",
			"url": "https://lua.org/ftp/lua-5.4.8.tar.gz",
			"sha256": "4f18ddae154e793e46eeab727c59ef1c0c0c2b744e7b94219710d76f530629ae"
		}]
	},
}
The URL specified here is from Lua’s download page, as is the SHA-256 sum to verify the download’s integrity. If a later version exists, consider substituting the URL and SHA-256 sum to use that later version.
This entry tells Flatpak how to build Lua, and where to get the code. In this case, the INSTALL_TOP variable tells Lua’s install step to install it inside the Flatpak sandbox, which will be necessary to make it available when compiling your app, as well as the next dependency:
com.example.LuaGObjectApp.json
			...
			"sha256": "4f18ddae154e793e46eeab727c59ef1c0c0c2b744e7b94219710d76f530629ae"
		}]
	},
	{
		"name": "LuaGObject",
		"no-autogen": true,
		"subdir": "LuaGObject",
		"make-install-args": ["LUA_VERSION=5.4", "PREFIX=/app"],
		"sources": [{
			"type": "git",
			"url": "https://github.com/vtrlx/LuaGObject",
			"tag": "0.10.2"
		}]
	},
}
This fetches LuaGObject from its Git repository, builds it, and installs it within the Flatpak sandbox.
Two important things to note:
- The Lua version needs to be explicitly stated, else LuaGObject defaults to installing itself for Lua 5.1. This behaviour was inherited from LGI when I forked it.
- Version 0.10.2 is LuaGObject’s latest release when this guide was last updated, but it’s possible a new release has been made—check the releases page and substitute for the newest tag to use that version of LuaGObject instead.
Now that the dependencies are in place, it’s time to tell the manifest how to build your app.
com.example.LuaGObjectApp
			...
			"tag": "0.10.2"
		}]
	},
	{
		"name": "main",
		"no-autogen": true,
		"sources": [{
			"type": "dir",
			"path": "."
		}]
	}]
}
Note the closing bracket character at the end here, as opposed to a comma.
Because the app’s code and Makefile live in the same folder as the Flatpak manifest you’ve written, the path to the project should just be the dot (.) character which just means “use the current folder”.
With this, you now have a Flatpak manifest that instructs Flatpak to
- Use the GNOME 49 platform to build the app
- Build and install Lua and LuaGObject to the app’s sandbox as dependencies
- Use your Makefile to compile your app
At this point, your completed Flatpak manifest should look like this:
com.example.LuaGObjectApp.json
{
	"app-id": "com.example.LuaGObjectApp",
	"runtime": "org.gnome.Platform",
	"runtime-version": "49",
	"sdk": "org.gnome.Sdk",
	"command": "main",
	"finish-args": [
		"--device=dri",
		"--share=ipc",
		"--socket=session-bus",
		"--socket=fallback-x11",
		"--socket=wayland"
	],
	"modules": [{
		"name": "lua",
		"no-autogen": true,
		"make-install-args": ["INSTALL_TOP=/app"],
		"sources": [{
			"type": "archive",
			"url": "https://lua.org/ftp/lua-5.4.8.tar.gz",
			"sha256": "4f18ddae154e793e46eeab727c59ef1c0c0c2b744e7b94219710d76f530629ae"
		}]
	},
	{
		"name": "LuaGObject",
		"no-autogen": true,
		"subdir": "LuaGObject",
		"make-install-args": ["LUA_VERSION=5.4", "PREFIX=/app"],
		"sources": [{
			"type": "git",
			"url": "https://github.com/vtrlx/LuaGObject",
			"tag": "0.10.2"
		}]
	},
	{
		"name": "main",
		"no-autogen": true,
		"sources": [{
			"type": "dir",
			"path": "."
		}]
	}]
}
Before the app can be run, however, its code must be modified ever so slightly. Add these two lines at the top of main.lua:
main.lua
package.cpath = "/app/lib/lua/5.4/?.so;" .. package.cpath
package.path = "/app/share/lua/5.4/?.lua;" .. package.path

local LuaGObject = require "LuaGObject"

local Adw = LuaGObject.Adw
local Gtk = LuaGObject.Gtk

...
If you’re using a different version of Lua, change the 5.4 in this example to the version you’re using.
By default, Lua only looks for libraries within certain system folders. Flatpak sandboxes are stored within a special folder called /app, which only the current sandbox has access to. As LuaGObject has been installed within the Flatpak sandbox, Lua won’t find it without being explicitly instructed to search within the correct folder. These two lines do exactly that: they add the specific /app subfolders to the relevant Lua search paths.
Finally, the app is now ready to be built and run. Do so with the following terminal commands:
$ flatpak-builder build \
	com.example.LuaGObjectApp.json \
	--user --install --force-clean
$ flatpak run com.example.LuaGObjectApp
The backslashes here are just to tell the command line to continue on the next line. You can instead omit them and include the entire command on one line—or just copy-paste them to your terminal.
As the core application code hasn’t changed, it’s likely that the app looks the same as well. Here it is again:
The same application as before.
6. Polishing
The core of your app has been finished, but there are a few “nice-to-haves” that have been omitted from the guide at this point in order to streamline it.
The most glaring omission at this time is the lack of a “development” version of your app. Having a separate “.Devel” version allows you to easily install two versions of the app at once, one of which you can refer to as your “stable” release, and one which you can use to test changes to your app as it’s being developed.
Start by copying com.example.LuaGObjectApp.json. Name the copy com.example.LuaGObjectApp.Devel.json, then open it in your text editor.
com.example.LuaGObjectApp.Devel.json
{
	"app-id": "com.example.LuaGObjectApp.Devel",
	"runtime": "org.gnome.Platform",
	"runtime-version": "49",
	...
The App’s ID needs to be changed to match the file name.
Add some extra lines to your app’s module, instructing the manifest to include extra variables when building it:
com.example.LuaGObjectApp.Devel.json
	...
	{
		"name": "main",
		"no-autogen": true,
		"make-args": ["DEVEL=true"],
		"make-install-args": ["DEVEL=true"],
		"sources": [{
			"type": "dir",
			"path": ".",
		}]
	}]
}
This variable will now be available in the Makefile, so make this change to use it.
Makefile
...
CFLAGS = -L $(PREFIX)/lib -Wl,-E $(LIBS)

ifdef DEVEL
CFLAGS += -DDEVEL
endif

$(BIN): $(SRCS) $(BYTECODES)
...
When the DEVEL variable has been defined, this Makefile will now add the flag -DDEVEL to the C compilation step. This will, in turn, make the DEVEL macro available to C code.
Continue by defining a new function in your C code:
main.c
... #includestatic int get_is_devel_lua(lua_State *L) { #ifdef DEVEL lua_pushboolean(L, 1); #else lua_pushboolean(L, 0); #endif return 1; } static const char main_bytecode[] = { ...
This is a function that can be exported to Lua. When called from Lua, it will return either true or false (which in C are just 1s or 0s) depending on whether or not the DEVEL macro was defined when compiling from the Makefile. That means that the “devel-ness” of your app will actually modify the app’s code itself here. It’s significantly more robust than simply passing a variable at run-time.
The way a C function works when exported to Lua is quite simple. The function must return a value of type int, and it must take a pointer to a lua_State as its argument. Lua’s C API functions are used with the Lua state that is passed to your custom Lua C function to extract parameters passed from your Lua script. You can then push values back to Lua using other Lua C API functions. Then, the Lua C function must return the exact number of arguments pushed, which will be used as return values. In this case, the function returns a single boolean value for whether of not the app is the development version.
You might have realized now that the application_id property of the Adw.Application object within your Lua code must also change based on whether this function returns true or false. That’s a correct assessment, but it’s possible to do something even better by building the application ID into the compiled program itself, using the same principles as the function you just wrote.
main.c
...
static int
get_is_devel_lua(lua_State *L)
{
#ifdef DEVEL
	lua_pushboolean(L, 1);
#else
	lua_pushboolean(L, 0);
#endif
	return 1;
}

static int
get_application_id_lua(lua_State *L)
{
#ifdef DEVEL
	lua_pushstring(
		L,
		"com.example.LuaGObjectApp.Devel");
#else
	lua_pushstring(
		L,
		"com.example.LuaGObjectApp");
#endif
	return 1;
}

static const char main_bytecode[] = {
...
Structurally, this function is quite similar to the last. The only difference is that it returns a string containing the correct application ID.
As usual, I’ve wrapped some lines for legibility. Feel free to put the parameters to lua_pushstring on the same line as the function call.
To use these functions from Lua, it isn’t enough to simply define them. They must be registered from the C code first. Start by creating the registry of functions you wish to export to Lua:
main.c
...
static int
get_application_id_lua(lua_State *L)
{
#ifdef DEVEL
	lua_pushstring(
		L,
		"com.example.LuaGObjectApp.Devel");
#else
	lua_pushstring(
		L,
		"com.example.LuaGObjectApp");
#endif
	return 1;
}

static const luaL_Reg mainlib[] = {
	{ "get_is_devel", get_is_devel_lua },
	{ "get_application_id", get_application_id_lua },
	{ NULL, NULL },
};

static const char main_bytecode[] = {
...
This registry contains one entry for each function, plus a { NULL, NULL } entry which tells Lua to stop searching for more functions to export. Each entry contains the Lua name for the function followed by the C name of the function. This exposes real C functions to Lua under the names given. In this case, the names are the same save for the lack of “_lua” suffix which the C functions have.
A registry does nothing without actually being registered to Lua. You need to do that manually before running your app. While it’s possible to simply make each function a global variable in the Lua state, defining variables within your global namespace is not recommended as it pollutes the namespace with extraneous variables at best, and can cause errors at worst. This isn’t much of a problem for small apps, but it’s best to develop good engineering habits early.
Instead, you’ll be making your functions available to Lua by calling require “mainlib” from Lua as you would with any other library. Inside the main() function, add the following lines after initializing Lua:
main.c
	...
	L = luaL_newstate();
	luaL_openlibs(L);

	lua_getglobal(L, "package");
	lua_getfield(L, -1, "loaded");
	lua_remove(L, -2);
	lua_pushstring(L, "mainlib");
	luaL_newlib(L, mainlib);
	lua_settable(L, -3);
	lua_remove(L, -1);

	lua_result = luaL_loadbuffer(
		...
If you don’t understand what these lines do, don’t worry too much. These are all some quite specific functions of Lua’s C API, which allows C code to interact with the Lua state in very precise ways. Still, here’s a play-by-play breakdown for the sake of it:
- Retrieve the value of the table “package” from the list of global variables, and keep it in temporary memory
- Retrieve the value of the field “loaded” from the last table to be loaded, and keep it in temporary memory
- Remove the table “package” from temporary memory
- Add the string “mainlib” to temporary memory (this will be used as the package’s name)
- Create a new library using the registry mainlib (which you defined in the last step) and keep it in temporary memory
- To the “loaded” table, set the field named “mainlib” to the new library created in step 5, removing both the name and library from temporary memory
- Remove the “loaded” table from temporary memory
At the end of these seven lines, all temporary memory has been cleaned up (which is very important to do, otherwise it breaks Lua in serious ways) and the C functions from the previous step have been collected into a table stored at package.loaded.mainlib from Lua.
When calling Lua’s require function, rather than always reloading a library from the computer’s storage, it will instead check if the named library has already been loaded by checking the package.loaded table for an entry with a matching name. Thus…
main.lua
package.cpath = "/app/lib/lua/5.4/?.so;" .. package.cpath
package.path = "/app/share/lua/5.4/?.lua;" .. package.path

local lib = require "mainlib"

local is_devel = lib.get_is_devel()
local application_id = lib.get_application_id()

local LuaGObject = require "LuaGObject"

local Adw = LuaGObject.require "Adw"
local Gtk = LuaGObject.require "Gtk"
...
…the functions you defined in C are now part of a Lua library called “mainlib”, which you can make available to your Lua code by calling require despite the fact that it isn’t a library in the traditional sense.
The code you added in the last step defines two local variables which you can now freely use in your Lua code. First, correct the application ID.
main.lua
...
local LuaGObject = require "LuaGObject"

local Adw = LuaGObject.require "Adw"
local Gtk = LuaGObject.require "Gtk"

local app = Adw.Application {
	application_id = application_id,
}
...
Adwaita provides a special .devel style class for application windows. Add it to your app’s main window by checking for the value of the is_devel variable you defined earlier:
main.lua
	...
	local window = Adw.ApplicationWindow {
		application = app,
		content = Adw.ToolbarView {
			content = vert_box,
			top_bars = Adw.HeaderBar {
				title_widget = title,
			},
		},
	}
	if is_devel then
		window:add_css_class "devel"
	end
	return window
end
...
Build and run com.example.LuaGObjectApp.Devel:
$ flatpak-builder build \
	com.example.LuaGObjectApp.Devel.json \
	--user --install --force-clean
$ flatpak run com.example.LuaGObjectApp.Devel
The development version of your app should now look like this:
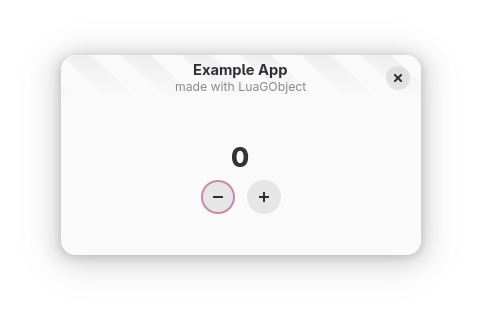
The header bar has diagonal stripes, showing it’s under construction
I admit: this is not a very impressive showing for something which took so much effort. The real goal, however, was not simply to add a cute little development style. The actual reason for doing all this was to get the groundwork ready to more deeply interface with the world of C in order to achieve a much more desirable outcome.
7. Localization
Otherwise known as “internationalization”, to localize an app means to get it ready for users who prefer to use applications in their own language. In this section, you’ll prepare your app for localization using the Gettext library and then you’ll translate it to another language—don’t fret, I’ll provide the necessary translations here.
Normally when programming in Lua, you’d use an application called LuaRocks to manage external libraries. This is absolutely possible to do with Flatpak, but it’s not necessary—as you’ve already seen with the inclusion of LuaGObject in your app’s Flatpak manifest. There already exist Gettext bindings for Lua, but they’re somewhat large, and risk automating some things which just don’t need automation. With but a dozen lines of C code, you can actually write your own Lua binding to Gettext while ensuring it does exactly what your app needs—and does nothing that may disrupt how your app works.
Flatpak’s GNOME 49 SDK already provides Gettext, but you’ll also need it installed locally on your machine for a few specific steps later:
On Debian or Ubuntu,
$ sudo apt install make gettext

On Fedora or RedHat,
$ sudo dnf install make gettext
If you’re using a different distro, it’s again assumed you’ll know how to procure these packages.
To access Gettext from C code, include its headers first:
main.c
#include <libintl.h>
#include <locale.h>
#include <lua.h>

#include <lauxlib.h>
#include <lualib.h>

...
Then, write a new C function to expose Gettext’s gettext() function to Lua and add it to the mainlib registry.
main.c
...
static int
get_application_id_lua(lua_State *L)
{
#ifdef DEVEL
	lua_pushstring(
		L,
		"com.example.LuaGObjectApp.Devel");
#else
	lua_pushstring(
		L,
		"com.example.LuaGObjectApp");
#endif
	return 1;
}

static int
gettext_lua(lua_State *L)
{
	const char *message_id;
	char *message;

	message_id = luaL_checkstring(L, 1);
	if (!message_id) {
		luaL_error(L, "No message ID given.");
		return 0;
	}

	message = gettext(message_id);
	lua_pushstring(L, message);
	return 1;
}


static const luaL_Reg mainlib[] = {
	{ "get_is_devel", get_is_devel_lua },
	{ "get_application_id", get_application_id_lua },
	{ "gettext", gettext_lua },
	{ NULL, NULL },
};
...
This new function is very straightforward. It takes a string parameter, then passes that to a call into gettext() from the C side, which returns the appropriate translated string if one exists (otherwise, it returns the untranslated text). If no message ID is given, then the function raises an error (which in all likelihood, will close your app). In this context, raising an error when you fail to pass a message ID is an entirely appropriate measure. Think of it like a syntax error: the app fails because you wrote incorrect code. The code you release should always invoke gettext() correctly, so your users should never run into this issue.
The Gettext library requires a few additional initialization steps. Your custom translation files, once they exist, will be placed within the Flatpak sandbox. This location needs to be indicated to Gettext from the C code:
main.c
...
int
main()
{
	lua_State *L;
	int lua_result;

	setlocale(LC_ALL, "");
	bindtextdomain("messages", "/app/share/locale");
	textdomain("messages");

	L = luaL_newstate();
	luaL_openlibs(L);
	...
Gettext will automatically look at your active configured language to determine which translation files to use, and with this setup, it will try searching for a file named /app/share/locale/[LANGUAGE]/LC_MESSAGES/messages.mo. To create this file, you need a compiled language file, which requires a translation file, which itself requires a template file.
A template file is generated by extracting translatable strings from your app’s source code. Gettext does this by searching the code for calls into the gettext function.
Start by assigning the gettext function you just wrote to a local variable at the top-level scope:
main.lua
...
local lib = require "mainlib"

local is_devel = lib.get_is_devel()
local application_id = lib.get_application_id()

local gettext = lib.gettext

local LuaGObject = require "LuaGObject"
local Adw = LuaGObject.require "Adw"
local Gtk = LuaGObject.require "Gtk"
...
This allows you to call the function by calling gettext without the lib. prefix. Gettext will specifically look for calls to a function named gettext—without any prefixes—when extracting translatable strings, so this makes it simple to do.
You app currently has four user-visible text strings. These are the button tooltips, the window’s title, and the window’s subtitle—all defined within the new_application_window() function. Mark these strings as translatable by turning them into gettext function calls:
main.lua
	...
	local inc_button = Gtk.Button {
		icon_name = "value-increase-symbolic",
		tooltip_text =
			gettext "Increase the value by 1.",
		extra_css_classes = { "circular" },
	}
	...
	local dec_button = Gtk.Button {
		icon_name = "value-decrease-symbolic",
		tooltip_text =
			gettext "Decrease the value by 1.",
		extra_css_classes = { "circular" },
	}
	...
	local title = Adw.WindowTitle.new(
		gettext "Example App",
		gettext "made with LuaGObject")
	local window = Adw.ApplicationWindow {
		application = app,
		content = Adw.ToolbarView {
		...
You can now generate a message template file using Gettext’s xgettext console command. While it’s entirely possible to call this function manually, it’s easier to automate the process using your Makefile.
First, however: make a new folder within your working folder and name it po. This is where all of your localization files will live.
Add the location of the necessary files to variables in your Makefile:
Makefile
SRCS = main.c
BYTECODES = main.bytecode
POTFILE = po/MESSAGES.pot
POFILES = $(wildcard po/*.po)
MOFILES = $(patsubst po/%.po, \
	locale/%/LC_MESSAGES/messages.mo, \
	$(POFILES))
BIN = main

PREFIX = /app
...
The POTFILE variable holds the location of your template file, which is MESSAGES.pot in the po folder.
The definition of POFILES uses a function called wildcard, which in this case returns a list of files ending in .po within the po folder—these are your translation files.
MOFILES uses another function called patsubst (pattern substitution), which transforms a list of file names into another corresponding list of file names. In this case, the resulting list will be the compiled message files that Gettext will use inside your app. This example uses backslash (\) characters to break the command into multiple lines. This is done simply for readability here—you may instead omit the backslashes and instead write this function all as one line, if you so choose.
Then, define the recipes which will create these files.
Makefile
...
%.bytecode: %.lua
	luac -o $@ -- $^

locale/%/LC_MESSAGES/messages.mo: po/%.po
	@mkdir -p `dirname $@`
	msgfmt $^ -o $@

po/%.po: $(POTFILE)
	[ -f $@ ] || msginit -i $^ -o $@ \
		-l $(patsubst po/%.po,%,$@).UTF-8
	msgmerge -U $@ $^

$(POTFILE): main.lua
	xgettext --from-code utf-8 -kgettext -o $@ $^

.PHONY: install

install: $(BIN) $(MOFILES)
	install -D -m 0755 -t $(PREFIX)/bin $(BIN)
	cp -r locale $(PREFIX)/share
The file po/MESSAGES.pot contains your app’s translatable text strings. Again, this recipe defines that this file depends on main.lua, which is where xgettext will look for messages to extract. The command to create this message template file also passes -kgettext into xgettext, which just tells the program to look for calls to a function called gettext. The program defaults to looking for calls to a function called _ (the underscore character), but in Lua this character is conventionally used as a way to mark multi-return values as unused. The existence of a function with that same name can cause odd interactions with Lua, so it’s best to avoid using it.
The second recipe is for any translation file. Translation files are typically named [lang]_[country].po, where [lang] is a lowercase two-character language code and [country] is an uppercase two-character country code. The translation file you’ll create will be named fr_CA.po, which would be for a Canadian French translation of your app. The recipe will use the msginit command to create the file if it doesn’t exist, then it uses msgmerge to update the translation file if new translatable lines have been added. The recipe also passes an -l parameter to msginit, which specifies the language it should target, as well as a note that it should use the newer and more ubiquitous UTF-8 encoding.
Finally, the third recipe is for compiled translation files. These are what Gettext will use in your app to determine which strings of text should actually be shown to the user. The first command in the recipe ensures that the destination folder exists, by querying the folder name of the target file, then creating that folder (and all parent folders). The structure of this folder mimics what Gettext expects inside the Flatpak sandbox. The install recipe is also updated so that this entire folder tree just gets copied to the sandbox, making it available to your app.
The second recipe corresponds to the .po translation files which actually will never be made by Make itself when building the app. These files are meant to be created by hand when it’s time to create a new translation. You can create them by invoking Make manually and specifying the path of the file you want to make:
$ make po/fr_CA.po
After invoking this command, the msginit program will also ask you for your email address. Feel free to go with the default it offers—it ultimately doesn’t matter because you won’t be publishing this app anyway.
Invoking the recipe creates your first translation file, which as previously mentioned is for Canadian French.
You can open this new file in your text editor, but it might be easier to use GNOME’s dedicated Translation Editor, which was made specifically for this.
If you open the file in your text editor and scroll down, you’ll see these four sections.
po/fr_CA.po
...

#: main.lua:27
msgid "Increase the value by 1."
msgstr ""

#: main.lua:37
msgid "Decrease the value by 1."
msgstr ""

#: main.lua:62
msgid "Example App"
msgstr ""

#: main.lua:63
msgid "made with LuaGObject"
msgstr ""
The exact line numbers will differ based on how you wrote main.lua.
Each translation has a comment indicating where in code each translatable string can be found, the “ID” of the message (which is just the original string), and the “message string” which should contain the translated string.
In order, the translations are:
- Augmenter la valeur par 1.
- Diminuer la valeur par 1.
- Appli Exemple
- créée avec LuaGObject
Feel free to copy-paste these translations, in particular the last one as it contains an accented character that you may possibly be ill-equipped to type out.
The translations in the translation file should look like this after the translations have been entered:
po/fr_CA.po
...

#: main.lua:27
msgid "Increase the value by 1."
msgstr "Augmenter la valeur par 1."

#: main.lua:37
msgid "Decrease the value by 1."
msgstr "Diminuer la valeur par 1."

#: main.lua:62
msgid "Example App"
msgstr "Appli Exemple"

#: main.lua:63
msgid "made with LuaGObject"
msgstr "créée avec LuaGObject"
Together with the recipes which have already been written, this will provide your application with a French translation.
Build as usual on the command line, then specify the correct value to the LANGUAGE variable when running the app.
$ flatpak-builder build \
	com.example.LuaGObjectApp.json \
	--user --install --force-clean
$ flatpak run --env=LANGUAGE=fr_CA.UTF-8 \
	com.example.LuaGObjectApp
Your finished app should look like this.
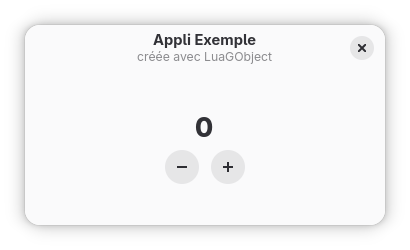
The same application as before, but in French.
Et voilà!
By this point in the guide, you’ve written:
- An app for GNOME
- You own Lua bindings to a C library
- Everything needed to make the app translatable, plus a Canadian French translation
- All the necessary glue code to get it working in Flatpak
8. Next Steps
This tutorial may have concluded, but your work as an application developer has not.
Not covered by this tutorial are subjects like writing app metainfo files, desktop entries, or app icons. These are all necessary steps to getting your app published, but this tutorial is long enough as it is and so these steps were omitted.
To see these things in a published app, check out Tally. I wrote it to make it easy to manage a large number of counters. In fact, you can think of this page as a guide for writing a very slimmed-down and simplified version of Tally!
(By that, I mean to say: consider writing a GNOME app which solves problems which other apps don’t already solve.)
If you have any questions about this guide, or if something hasn’t worked for you, I implore you to get in touch via email or on Mastodon. I wrote this guide for you, and it would do you no good if it didn’t work. Yet, I am just one person. I can’t foresee all the problems you might run into, and letting me know that something is wrong in this guide will help me to correct the problems you find so that the next reader has an easier time getting started.
Epilogue: Why?
The significant length of this guide might prompt some to ask: why?
GNOME has official bindings for a handful of programming languages: C (and C++), Python, Vala (a language specifically built on GObject), Javascript, and Rust. The beginner’s guide on GNOME’s website has complete support for writing an app in each of these languages (except Rust). Lua is not among the well-supported languages for GNOME, so why not use a language with a healthier ecosystem?
The answer is quite simple: I have tried, and failed.
These other ecosystems simply do not get along with my brain and the way I approach things. Many languages feature multiple very distinct ways of solving certain problems, and when confronted with this choice I am often left paralyzed with indecision. Tools which abstract away many ugly details—such as UI files or the Meson build system—are quite impressive when they work right, but when they don’t I am left needing to deal with two layers of tooling that I barely understand. The “easy” path paved by GNOME’s excellent and dedicated contributors is one which I can barely navigate—and this is despite contributing to several apps written within these parameters. I just can’t do it.
The huge amounts of effort I have put into working with the conventional tools has gotten me no closer to being able to work with them effectively. I only began to make progress in GNOME app development when I shifted my efforts into using LGI—from which LuaGObject was forked—to write apps in Lua, manually putting putting widgets into layouts and manually listening to specific signals to tie everything together. I may have put more effort into this, but I was rewarded with forward progress at every step of the way. That’s not something I can say of the methodology that is recommended. All of this work in developing GNOME apps for Lua has led me to releasing one app, writing another which should soon be ready for release, and forking off the library that made it all possible so that I can make it easier for others to take the path I did.
GNOME strives to be the desktop that can be used by anyone. The design ideas that went into attempting to achieve this goal are why I use it. However, I think a desktop for everyone can’t work if those who think in highly unusual ways are unable to contribute as app developers. Not everyone can tolerate IDEs or pre-built templates with a dozen unexplained files generated without context. A desktop where it is expected that developers all have the same technical background and tolerance of unknowns cannot rightly call itself the universal deskop, but at the same time I can’t expect GNOME’s contributors—who are largely volunteers—to do that work for me. No one else was going to make it possible, so it fell on me to do it. I know that I’m not the only developer who finds the default way of developing GNOME apps to be impossible to reason about, because others have reached out to me to tell me as much. That is, ultimately, why I wrote this guide: to do what others did not—or could not—and pave the way for the GNOME ecosystem to gain a more diverse set of contributors.